Physical Address
304 North Cardinal St.
Dorchester Center, MA 02124
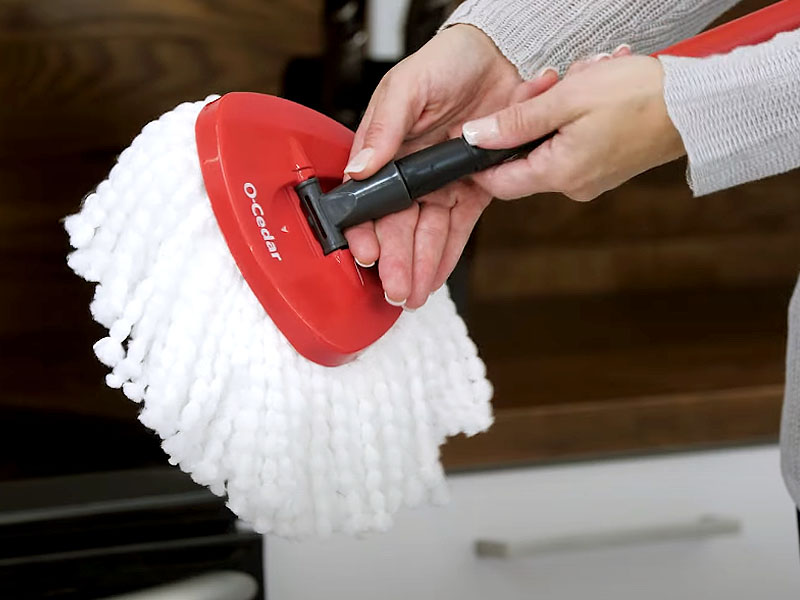
If you’re tired of dealing with a dirty mop that just doesn’t cut it anymore, you’re in the right spot! In this guide, we’ll show you the easy-peasy steps to make your O Cedar mop head sparkle like new.
Your O Cedar mop does a lot of hard work around the house, but it needs a little TLC too. Over time, it can get pretty grubby, making your floors less than fabulous. But don’t worry! With our clear and easy instructions, you’ll have your mop head looking fresh and ready to tackle any mess in a jiffy.
So, grab your cleaning gear and get ready to level up your mop game. No more yucky floors or struggling with a dirty mop. Let’s dive into the simple tricks to keep your O Cedar mop head in tip-top shape!

To clean the O Cedar mop head effectively, start by removing any loose debris from the surface. This will ensure a thorough and efficient cleaning process, leaving your mop head fresh and ready to use.
The first method to remove loose debris is by giving the mop head a good shake. Hold the mop head firmly, and vigorously shake it up and down to dislodge any dirt, dust, or hair that may have accumulated on the surface.
An alternative method to remove loose debris is by using a vacuum cleaner. Attach the upholstery or brush attachment to your vacuum and gently run it over the mop head. This will help to suck up any loose debris that may be stuck in the mop fibers.
When vacuuming the mop head, make sure to cover all areas thoroughly. Pay special attention to the corners and edges where debris tends to accumulate. Move the vacuum in different directions to ensure that all loose debris is sucked up effectively.
Once you have completed these steps, your O Cedar mop head will be rid of any loose debris, making it ready for a deeper cleaning session. By removing this loose debris, you’ll be ensuring that your mop head stays in top condition, improving its longevity, and maintaining its cleaning efficiency.
When it comes to getting your O Cedar mop head thoroughly clean, one of the most effective methods is to pre-soak it in warm soapy water. This simple yet powerful technique helps to break down dirt, grime, and residue, leaving your mop head looking and smelling fresh.
To begin the pre-soaking process, you’ll need to gather a few supplies. Fill a bucket with warm water, ensuring it is at a temperature that is comfortable to touch. Remember, lukewarm water is best as it helps to loosen and dissolve dirt without damaging the mop fibers.
Next, it’s time to submerge the O Cedar mop head in the warm soapy water. Gently agitate the mop head in the bucket to ensure all parts of the mop are covered. This will allow the soapy water to penetrate the fibers, effectively lifting and dissolving any built-up grime.
Letting the mop head soak for a sufficient amount of time is crucial for achieving optimal results. Aim to let it sit for at least 15 minutes, allowing the soap to work its magic. This gives the cleaning agents enough time to break down any stubborn stains or odors that may be clinging to the mop head fibers.
During this time, you might consider using a clean brush to gently scrub any particularly dirty areas on the mop head. This additional step can help ensure that even the toughest dirt is removed, leaving your mop head looking pristine.
Once the pre-soak is complete, you can move on to the next steps in the cleaning process. Whether you choose to hand wash or machine wash your O Cedar mop head, pre-soaking in soapy water provides a solid foundation for achieving a thorough and effective clean.

To effectively clean your O Cedar mop head, remember to scrub and rinse it thoroughly. This will ensure that it is free from dirt and grime, leaving your floor sparkling clean.
Now that you have removed excess dirt and debris from your O Cedar mop head, it’s time to give it a deeper clean. A simple and effective way to do this is by scrubbing the mop head with a brush. This helps to loosen and remove any stubborn stains or residue.
Here’s how you can scrub the mop head with a brush:
Rinsing the mop head thoroughly after scrubbing is important to ensure that all traces of dirt, residue, and cleaning solution are completely removed. This step helps to keep the mop head in optimal condition and ready for its next use.
Follow these steps to rinse the mop head thoroughly:
Cleaning and maintaining your O Cedar mop head is a simple process that can help prolong its lifespan and ensure optimal cleaning performance. By scrubbing the mop head with a brush and rinsing it thoroughly, you can keep it in top condition and ready to tackle your cleaning tasks with ease.
Keeping your O Cedar mop head clean and germ-free is essential for maintaining a hygienic living space. In this fourth and final tip, we will guide you through the process of disinfecting your mop head for effective cleaning.
Before you begin the disinfection process, it is important to prepare a suitable solution that will effectively kill germs and bacteria. One common and highly effective disinfecting solution can be made using household bleach. To prepare this solution, follow these steps:
It is essential to follow safety precautions while working with bleach. Make sure to wear gloves and work in a well-ventilated area to avoid any skin or respiratory irritation.
Once you have prepared the disinfecting solution, it’s time to disinfect your O Cedar mop head. Follow these simple steps to ensure a thorough disinfection:
During this soaking period, you can take the opportunity to clean the mop handle and any other detachable parts using a mild detergent and water solution.
After the soaking time has elapsed, remove the mop head from the disinfecting solution and gently squeeze out any excess liquid. Avoid wringing or twisting the mop head too vigorously, as this can damage its fibers. Now, you are ready to reattach the mop head to the mop handle and continue with your cleaning routine.
After giving your O Cedar mop head a thorough cleaning, it’s crucial to properly dry and store it to ensure its longevity and effectiveness. Following these steps will help you keep your mop head in excellent condition.
Before you proceed with drying the mop head, make sure to squeeze out as much excess water as possible. This step will help speed up the drying process and prevent any mold or mildew from forming. To do this, simply grasp the mop head firmly and squeeze it between your hands, working your way from the top down to the bottom. Repeat this process a few times until you’ve removed as much water as you can.
To allow your O Cedar mop head to air dry properly, find a suitable location to hang it. You can use a clothesline, a towel rack, or even a sturdy hanger. Make sure the mop head is hanging freely and isn’t touching any surfaces that might hinder the drying process. Ideally, choose a well-ventilated area, such as near an open window or a fan, to enhance air circulation and speed up drying time.
To further avoid potential bacteria growth or unpleasant odors, it’s best to hang the mop head in a location with good airflow and avoid any damp or humid areas.
Leave the mop head undisturbed until it is completely dry. Depending on the ambient conditions, this could take a few hours up to overnight. It’s important to note that drying times may vary, so it’s always a good idea to check the mop head before using it again to ensure it’s fully dry.
Once your O Cedar mop head is completely dry, the final step is to store it properly. Store the mop head in a clean and dry environment away from direct sunlight. One option is to store it in a ventilated cabinet or a dedicated mop storage area. Ensure that the mop head is stored in a way that protects it from dirt, dust, and potential damage.
To prolong the life of your O Cedar mop head and maintain its effectiveness, it’s essential to follow these drying and storage tips. By doing so, you’ll ensure that your mop head is always ready for the next cleaning task, allowing you to achieve sparkling clean floors effortlessly.
No, you should not put your O cedar mop head in the dryer.
To deep clean mop heads, start by removing any loose debris. Then, soak the mop heads in a mixture of hot water and detergent for about an hour. After that, rinse them thoroughly and let them air dry. Remember to wash mop heads separately from other laundry items.
It is recommended to clean the O Cedar mop head after each use to maintain its effectiveness.
To remove stains from the O Cedar mop head, soak it in a mixture of warm water and mild detergent, then rinse thoroughly.
No, the O Cedar mop head is not machine washable. It is best to hand wash it to prevent any damage.
After cleaning, hang the O Cedar mop head in a well-ventilated area to air dry completely before storing.
The lifespan of the O Cedar mop head depends on usage and care. On average, it can last up to 6 months with regular cleaning and maintenance.
No, it is not recommended to use bleach on the O Cedar mop head as it can cause discoloration and damage to the fibers.
I hope you found these tips helpful in keeping your O Cedar mop head clean and ready for action! By following these easy steps, you can make sure your floors stay sparkling clean without any hassle.
Remember, a clean mop head means cleaner floors and a happier home. So, next time you notice your mop looking a bit worse for wear, don’t fret. Just remember these simple techniques, and you’ll be able to freshen it up in no time.
Here’s to a future filled with gleaming floors and effortless cleaning!